
InBox CMDBInventorySync
Version 7.0.1
Date of criation 05/04/2020
Resources
This module aims to assist the management of CMDB inventory integrations. It is possible to create integrations with several third party systems.
Currently it is possible to create integrations with:
• Zabbix; • DBConnector; • OCS Inventory (2.4 and newer);
Soon it will be possible to manage integrations with:
• LANDesk Management Suite;
Prerequisites
Framework
The following versions of the Znuny framework are supported:
- [7.0.x]
Modules
The following modules are required:
- InBox Core 7.0.1 or superior
- GeneralCatalog 7.0.0 or superior
Operational system
The following operating systems are required:
- [None]
Third Party Software
The following third party software is required:
- [None]
Installation
bin/znuny.Console.pl Admin::Package::Install /path/to/InBox\ CMDBInventorySync-7.0.1.opm
Configuration
This module can be configured via System Configuration in the administrative interface. The following configuration options are available:
CMDBInventory::Objects
Defines the available integration objects;
Daemon::SchedulerCronTaskManager::Task###ZabbixInventorySync
Cron configuration that will perform the integrations related to Zabbix.
Daemon::SchedulerCronTaskManager::Task###DBConnectorSync
Cron configuration that will perform the integrations related to DBConnector.
Daemon::SchedulerCronTaskManager::Task###OCSInventorySync
Cron configuration that will perform the integrations related to OCS Inventory.
Use
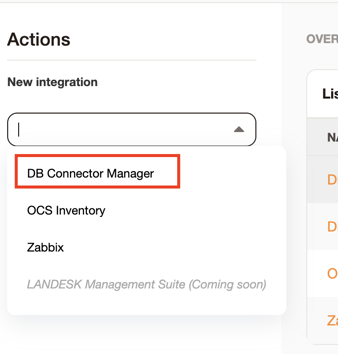
Create an integration
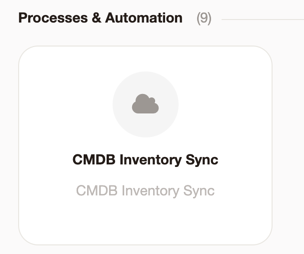
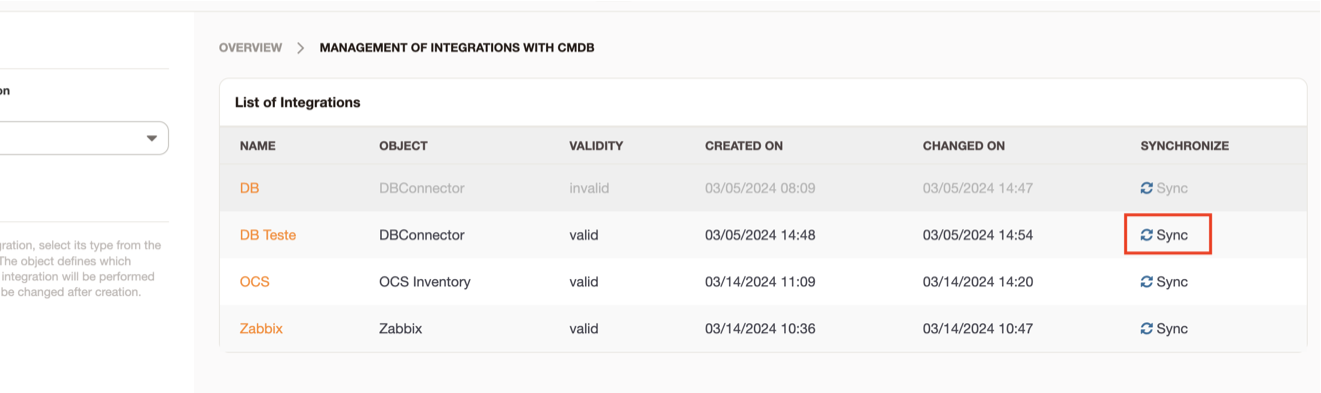
Access the administrative area and click on "CMDB Inventory Synchronization";
When accessing, all created integrations will be listed.
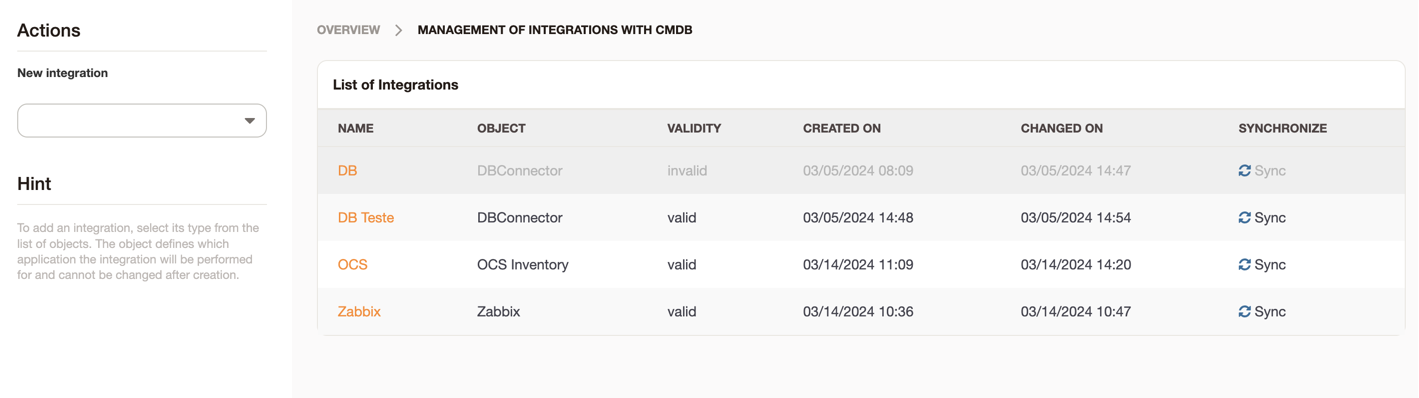
To add, select the integration object beside:

For each object, the creation screen will follow according to the necessary configuration.
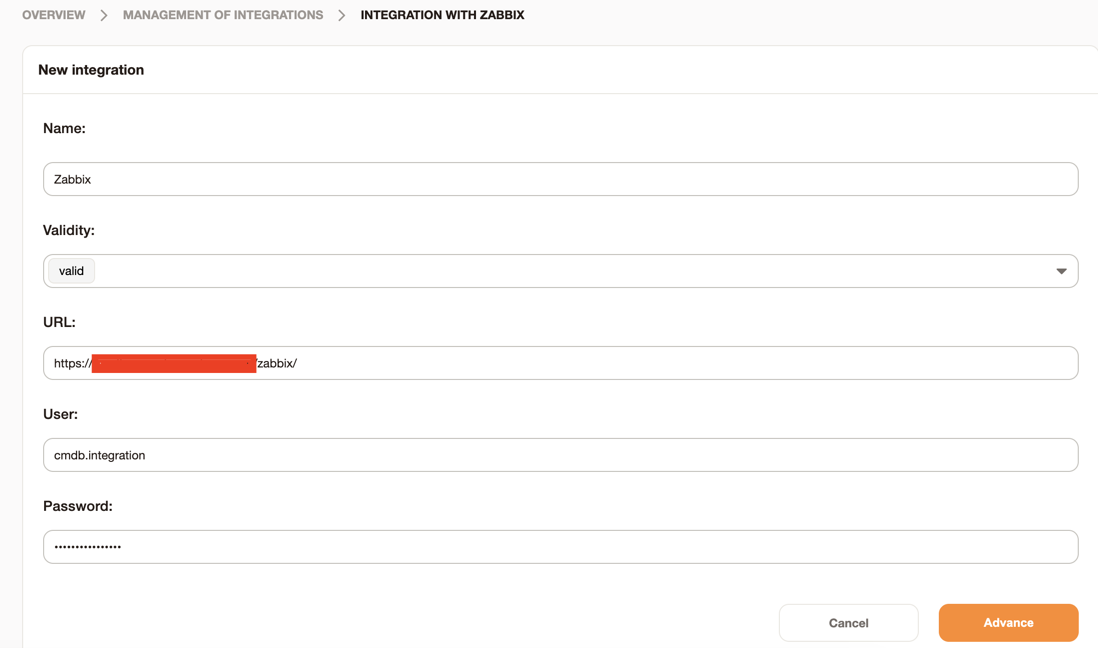
Integration with Zabbix
For the integration with Zabbix you will need the following API information:
- URL
- User
- Password
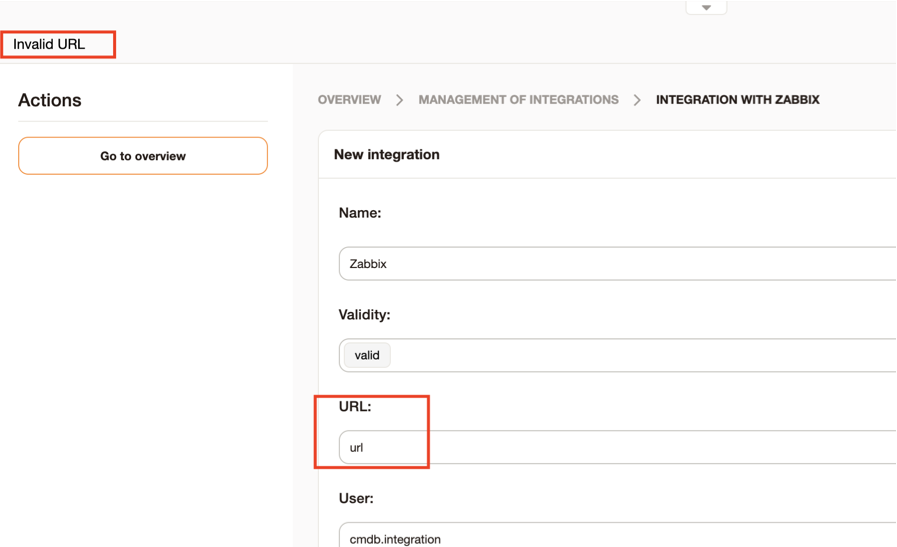
Before continuing, the module verifies that the data provided is correct:
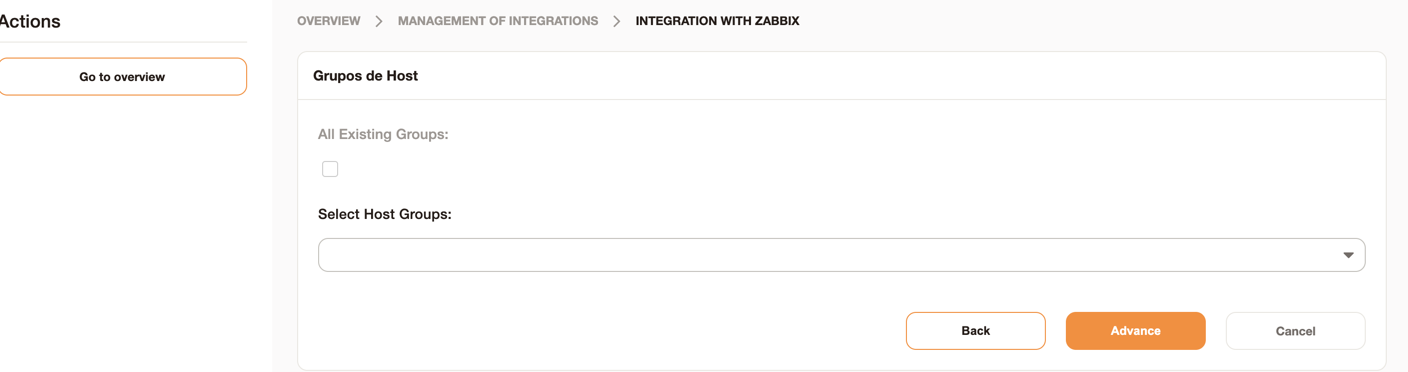
With the data entered correctly, when advancing it will be necessary to choose the groups of hosts or check the option "All Existing Groups" to determine which hosts will be integrated in the Znuny.
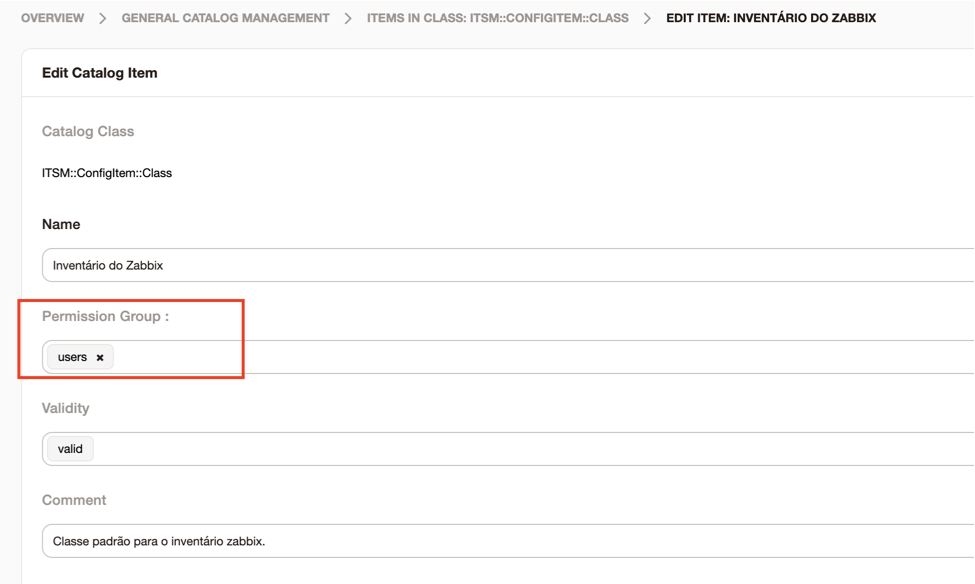
Then you must choose which class of CMDB should receive the hosts.

By default, a class is created when installing the module. The "Zabbix Inventory" class must be granted group permission in the catalog settings to function properly.
The basic definition for creating another class is:
[
	{
		Key => "Description",
		Name => "Description",
		Searchable => 1,
		Input => {
			Type => "TextArea",
			Required => 0,
		},
		CountMin => 1,
		CountMax => 1,
		CountDefault => 1,
	},
	{
		Key => "HostID",
		Name => "Host ID",
		Searchable => 1,
		Input => {
			Type => "Text",
		},
	},
	{
		Key => "HostGroupID",
		Name => "Host Group ID",
		Searchable => 1,
		Input => {
			Type => "Text",
		},
	},
	{
		Key => "HostGroupName",
		Name => "Host Group Name",
		Searchable => 1,
		Input => {
			Type => "Text",
		},
	},
	{
		Key => "LinkInventory",
		Name => "Link Inventory",
		Searchable => 1,
		Input => {
			Type => "Text",
		},
	},
]
YAML:
- Key: Description
	Name: Description
	Searchable: 1
	Input:
		Type: TextArea
		Required: 1
	CountMin: 0
	CountMax: 1
	CountDefault: 0
- Key: HostID
	Name: HostID
	Searchable: 1
	Input:
		Type: Text
- Key: HostGroupID
	Name: HostGroupID
	Searchable: 1
	Input:
		Type: Text
- Key: HostGroupName
	Name: HostGroupName
	Searchable: 1
	Input:
		Type: Text
- Key: LinkInventory
	Name: LinkInventory
	Searchable: 1
	Input:
		Type: Text
Once the class is defined, click save.
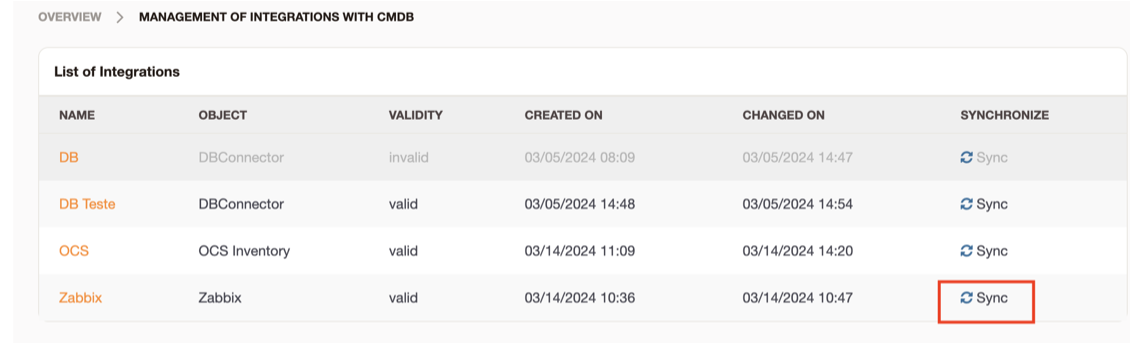
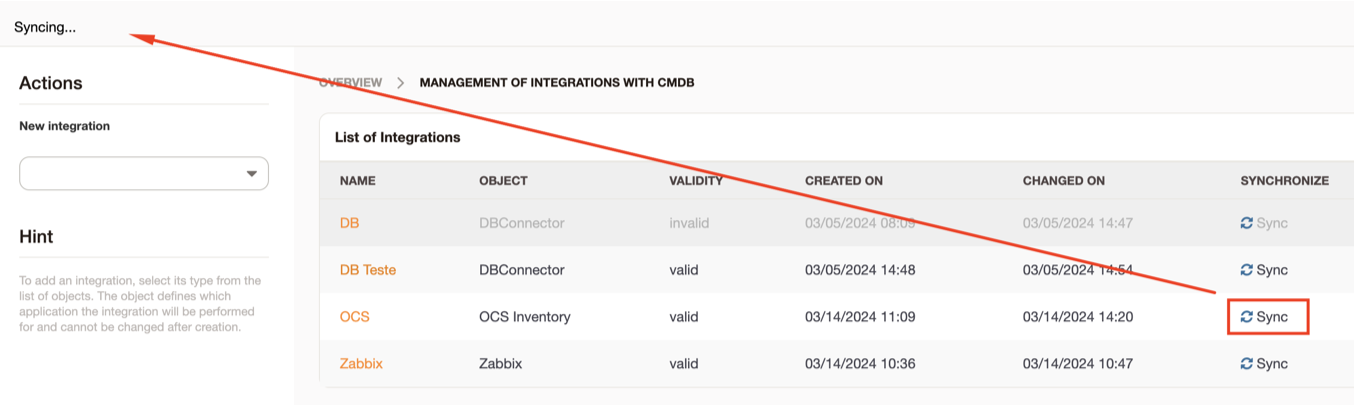
In the list screen it is possible to synchronize by clicking on the "Synchronize" button;
Upon clicking, a message is displayed informing the start of synchronization;
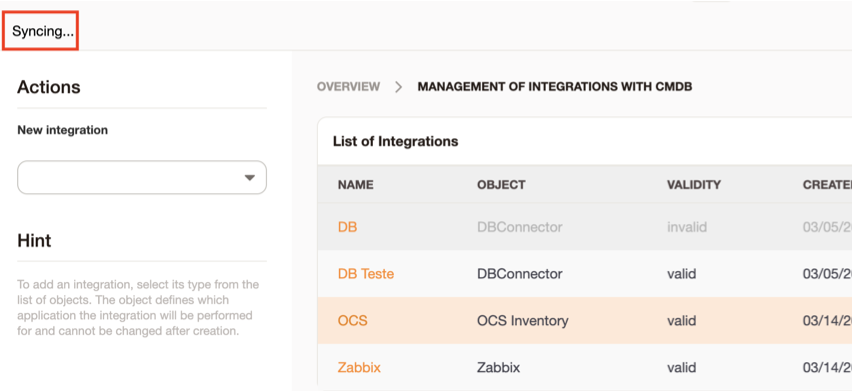
When finished, a message is displayed informing the synchronization success:
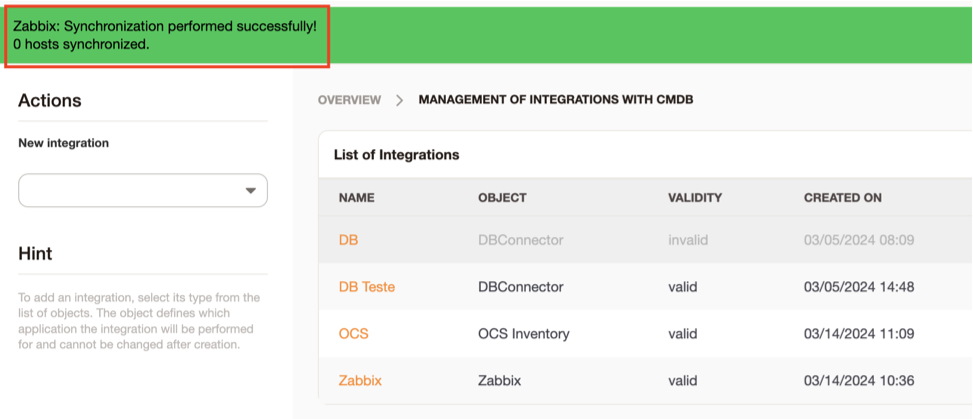
Synchronized successfully, you can now view the hosts in the CMDB class.
Synchronization is also performed automatically by setting the time through the configuration: Daemon::SchedulerCronTaskManager::Task###ZabbixInventorySync
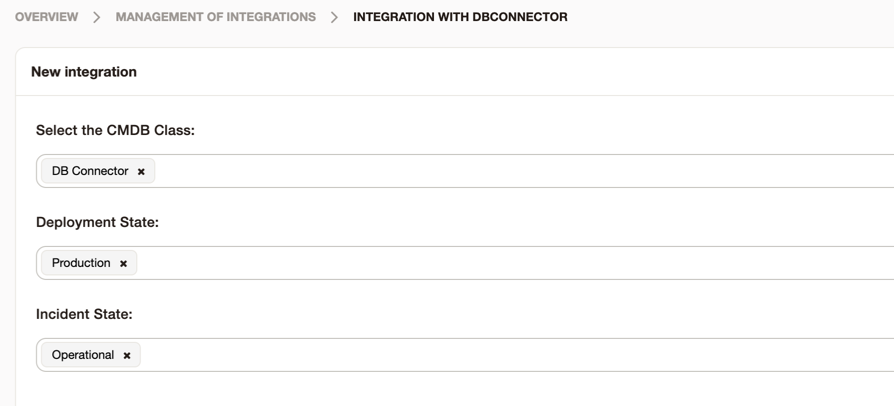
Integration with DBConnector
Required modules for each database
DBD::mysql  => MySQL or MariaDB
DBD::ODBC   => MS-SQL
DBD::Oracle => Oracle
DBD::Pg		=> PostgreSQL
After that it is already possible to integrate
To integrate, navigate to the integration management screen and choose the 'Connector with BD' option:
Add the parameters requested by the module:

DNS must match for each equivalent connector:
DBD::mysql  => DBI:mysql:database=DATABASE;host=HOST
DBD::ODBC   => DBI:ODBC:driver={SQL Server};Database=DATABASE;Server=HOST,1433
DBD::Oracle => DBI:Oracle://HOST:1521/DATABASE
DBD::Pg     => DBI:Pg:dbname=DATABASE;host=HOST
After that, define the cmdb class that will be made the relation and the state parameters:
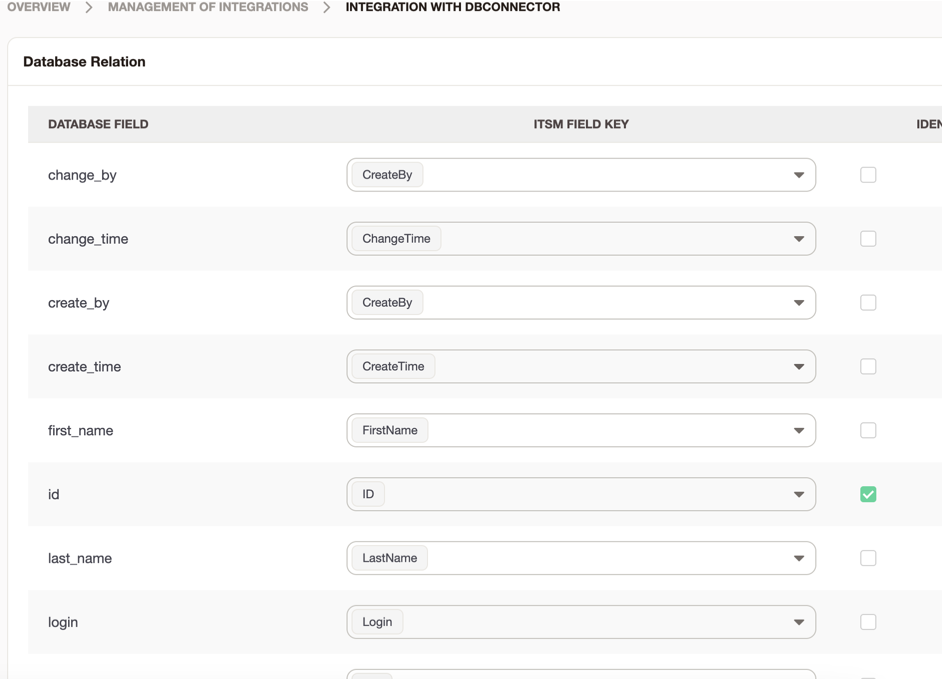
After making this list, indicate the bank table column that will have the value saved in the key item that is chosen with it.
Then it is already possible to synchronize the data:
** The first column of the sql table is used as the identification value of the configuration item. ** If there is more than 1 row in the sql with the first column (identifier) the same, it will be treated in the same way with multivalued fields and only 1 item with the key will remain.
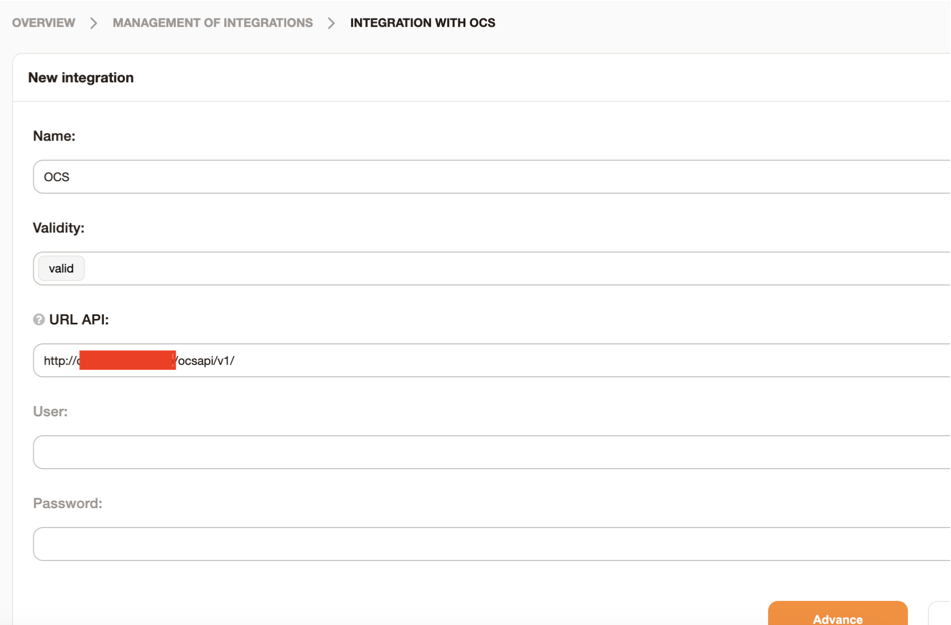
Integration with OCS Inventory
Attention: Integration with OCS uses OCS Inventory REST API! Make sure the API is available on the server where OCS is located.
For more information access the OCS Inventory REST API documentation
For the integration with OCS Inventory you will need the following API information:
- URL
- User* (if configured)
- Password*(if configured)
- Basic authentication
As you proceed, you will be redirected to the configuration screen where you can define which computers will be synchronized according to the TAG defined in the OCS.
You can also choose to save in the attachment of the configuration item all the return of the request in JSON format.
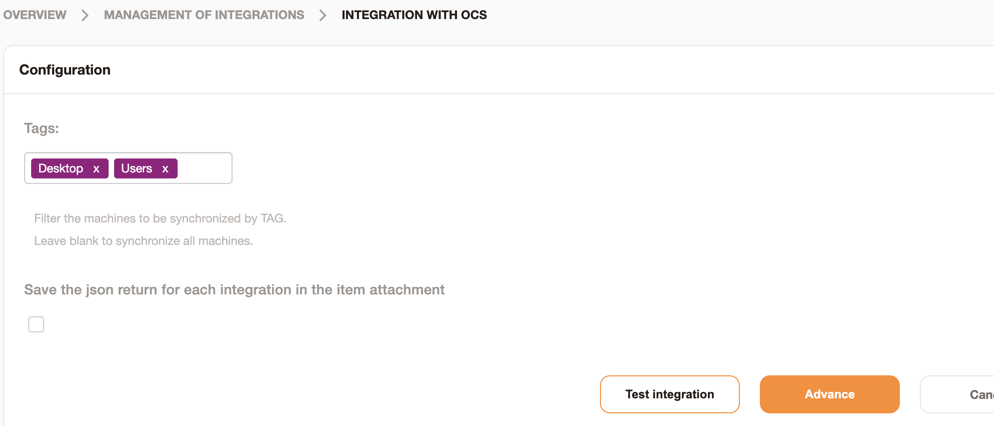
You can verify that the integration is configured correctly by clicking the test integration button. If all goes well, a download of the JSON return from an OCS machine will start, the integration is OK.
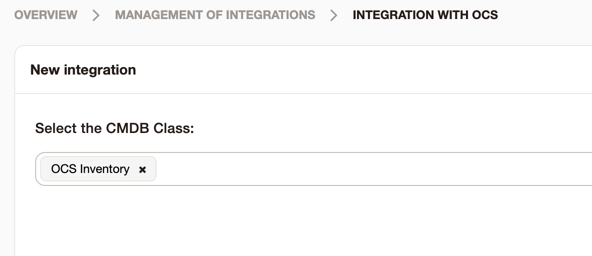
As you proceed, you will be redirected to the CMDB class configuration that will be used to create the OCS items.
The class must be defined correctly. Use the definition below and change the definition of the class configured in the integration.
Download class definition for OCS Inventory
When finished and click on sync, the integration will start:
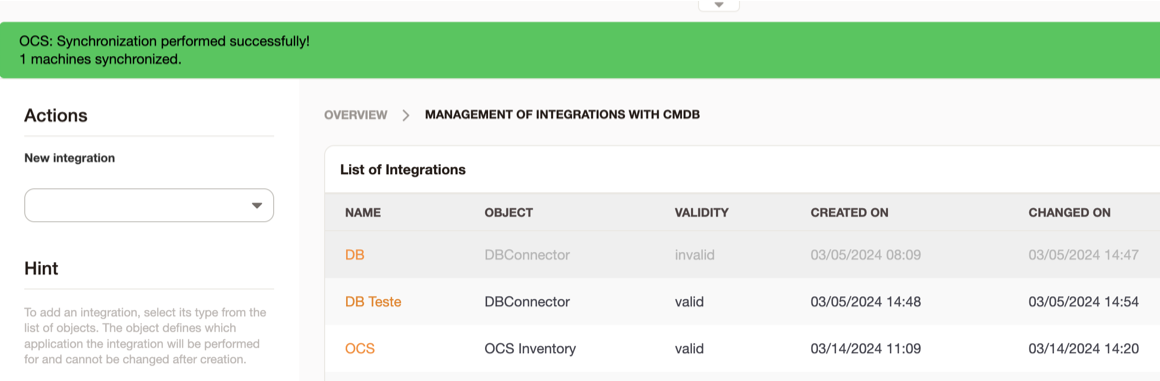
Upon completion, a success message will be displayed:
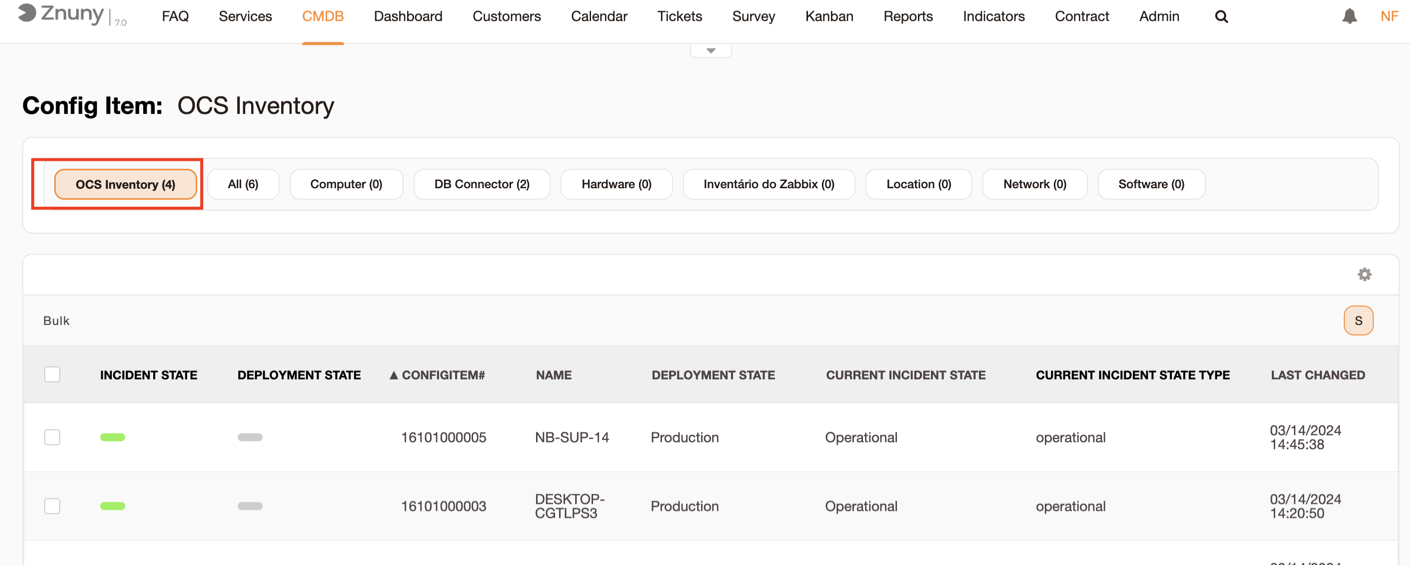
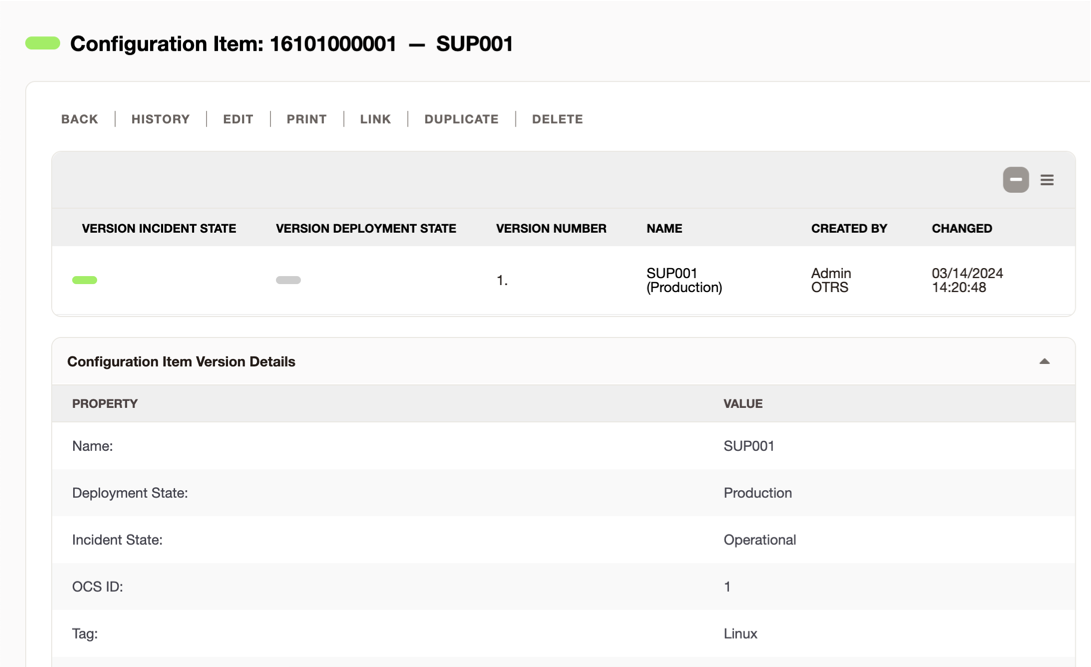
When accessing the class, it will be possible to view the items created:
You can define the time when the integration will be performed automatically through the configuration Daemon::SchedulerCronTaskManager::Task###OCSInventorySync